
今回からタイトルを変えました。こちらのサイトのメロディーとともにお楽しみください。
正式なタイトルはVisual StudioのXamarinでAndroidアプリを作る(#4) TwoTouchMailを作るです。
4回目となる今回は、「作ればわかる!Androidプログラミング」の第二章のサンプルアプリTwoTouchMailをXamarinで作ってみます。とは言っても、インテントでデータを渡す方法やアクティビティを指定しない暗黙的なインテントについてはこれまでの3回ですでに説明しました。
今回説明するのは、dimens.xml、RadioGroupの使い方、そしてStrings.xmlに登録した文字列をC#のコードで取得する方法です。
dimens.xmlにはpaddingで使うマージンのサイズを登録します。dimens.xmlは新規作成するXMLファイルです。
dimen.xml
<?xml version="1.0" encoding="utf-8" ?>
<resources>
  <!-- Default screen margins, per the Android Design guidelines. -->
  <dimen name="activity_horizontal_margin">16dp</dimen>
  <dimen name="activity_vertical_margin">16dp</dimen>
</resources>
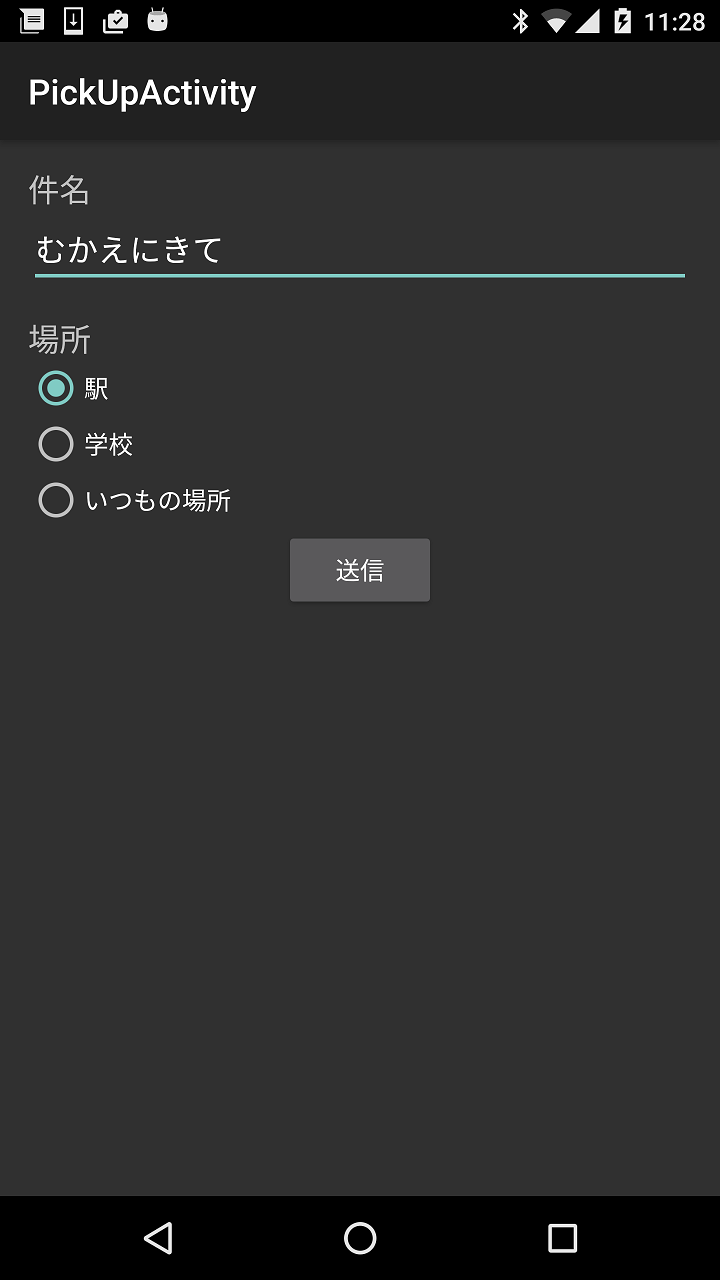
そして、レイアウトファイルにマージンを指定します。下記のサンプルはお迎えを頼むPickUp.axmlです。
RelativeLayoutの内側に余白を作るためにdimens.xmlの縦横marginをpaddingXXXXXXに指定しています。
PickUp.axml
<?xml version="1.0" encoding="utf-8"?>
<RelativeLayout xmlns:android="http://schemas.android.com/apk/res/android"
    android:layout_width="match_parent"
    android:layout_height="match_parent"
    android:paddingBottom="@dimen/activity_vertical_margin"
    android:paddingLeft="@dimen/activity_horizontal_margin"
    android:paddingRight="@dimen/activity_horizontal_margin"
    android:paddingTop="@dimen/activity_vertical_margin">
    <TextView
        android:text="@string/subject"
        android:layout_width="wrap_content"
        android:layout_height="wrap_content"
        android:textSize="18sp"
        android:id="@+id/textView" />
    <EditText
        android:layout_width="match_parent"
        android:layout_height="wrap_content"
        android:id="@+id/editText"
        android:layout_below="@+id/textView"
        android:layout_alignParentLeft="true"
        android:layout_alignParentStart="true"
        android:text="@string/button_pickup" />
    <TextView
        android:layout_width="wrap_content"
        android:layout_height="wrap_content"
        android:textAppearance="?android:attr/textAppearanceMedium"
        android:text="@string/place"
        android:id="@+id/textView3"
        android:layout_below="@+id/editText"
        android:layout_alignParentLeft="true"
        android:layout_alignParentStart="true"
        android:layout_marginTop="16dp" />
    <RadioGroup
        android:id="@+id/rg_place"
        android:layout_width="fill_parent"
        android:layout_height="wrap_content"
        android:layout_below="@+id/textView3"
        android:layout_alignParentLeft="true"
        android:layout_alignParentStart="true">
        <RadioButton
            android:layout_width="wrap_content"
            android:layout_height="wrap_content"
            android:text="@string/station"
            android:checked="true"
            android:id="@+id/radioButton1" />
        <RadioButton
            android:layout_width="wrap_content"
            android:layout_height="wrap_content"
            android:text="@string/school"
            android:id="@+id/radioButton2" />
        <RadioButton
            android:layout_width="wrap_content"
            android:layout_height="wrap_content"
            android:text="@string/always"
            android:id="@+id/radioButton3" />
    </RadioGroup>
    <Button
        android:layout_width="wrap_content"
        android:layout_height="wrap_content"
        android:text="@string/button_send"
        android:id="@+id/button"
        android:layout_below="@+id/rg_place"
        android:layout_centerHorizontal="true" />
</RelativeLayout>
これで、TextViewやRadioGroupの周囲に空白ができます。
次にRadioGroupの使い方に進みます。PickUp.axmlにあるようにRadioGroupは複数のRadioButtonをグループ化して、択一にするために使います。この例の場合、一番上のラジオボタンのandroid:checkedが”true”になっています。
RadioGroupを使うPickUpActivityクラスのコードをみていきましょう。
PickUpActivityクラス
   public class PickUpActivity : Activity
    {
        protected override void OnCreate(Bundle savedInstanceState)
        {
            base.OnCreate(savedInstanceState);

            // Create your application here
            SetContentView(Resource.Layout.PickUp);

            var btnSend = FindViewById<Button>(Resource.Id.button);

            btnSend.Click += delegate {
                RadioGroup rgPlace = (RadioGroup)FindViewById(Resource.Id.rg_place);
                int checkedId = rgPlace.CheckedRadioButtonId;
                String strPlace = ((RadioButton)FindViewById(checkedId)).Text;
                EditText edit01 = (EditText)FindViewById(Resource.Id.editText);
                String title = edit01.Text;

                Context context = this;
                Android.Content.Res.Resources res = context.Resources;

                var uri = Android.Net.Uri.Parse("mailto:" + res.GetString(Resource.String.mail_to));

                Intent intent = new Intent(Intent.ActionSendto, uri);
                intent.PutExtra(Intent.ExtraSubject, title);
                intent.PutExtra(Intent.ExtraText, strPlace + "に迎えにきて");
                StartActivity(intent);

            };

        }
    }
btnSendがクリックされたら、選択されているRadioButtonのTextをメール本文に含めるようにしたいのですが、まず選択されているラジオボタンのIDを次のコードで取得します。
int checkedId = rgPlace.CheckedRadioButtonId;
Android SDKをJavaで使っている場合、選択されているボタンのIDはメソッドで取得します。Xamarinの場合はプロパティとして取得できますので、若干お得感があります。
次にStrings.xmlに登録した文字列を取得する方法ですが、Android.Content.ResのResourcesクラスのGetStringメソッドで取得できます。Resource.String.mail_toはStrings.xmlに登録した送信先のメールアドレスです。
そして、ActionSendtoを指定してIntentを生成し、PutExtraメソッドでタイトルや本文を付与し、StartActivityメソッドで暗黙的インテント(明示的に遷移先を指定しないインテント)を発行します。
すると、メールアプリが起動します。

これで簡単にメールを送るアプリができました。